


In today’s fast-paced business environment, keeping track of customer interactions is essential for delivering a seamless customer experience. Dynamics 365 CRM offers powerful tools to capture and manage customer emails, especially with Outlook integration. By tracking Outlook emails in Dynamics 365, organizations can ensure important communications are centralized, enabling better collaboration and faster response times. Learn more about CRM Implementation Services to maximize email tracking efficiency.
Key Benefits of Tracking Emails in Dynamics 365 CRM
- Centralized Communication: All customer interactions are stored in one place, improving transparency and consistency.
- Enhanced Productivity: Sales and service teams can access key email data without switching platforms. Learn how Microsoft Business Central enhances CRM and email integration.
- Streamlined Follow-ups: Automated tracking makes it easier to stay on top of customer inquiries and sales opportunities.
Set up
The Dynamics 365 App for Outlook allows you to access Dynamics 365 Sales data directly within Outlook, enabling you to track emails, create new records, view customer insights, and perform other CRM-related tasks without switching between applications.
To deploy the Dynamics 365 App for Outlook, in your organisation, follow these steps
Step 1: Set the default synchronization method
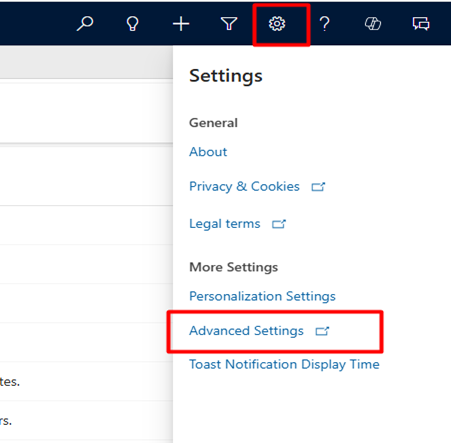
From your app, go to Settings > Advanced Settings.

2. Go Administration and then select Email.
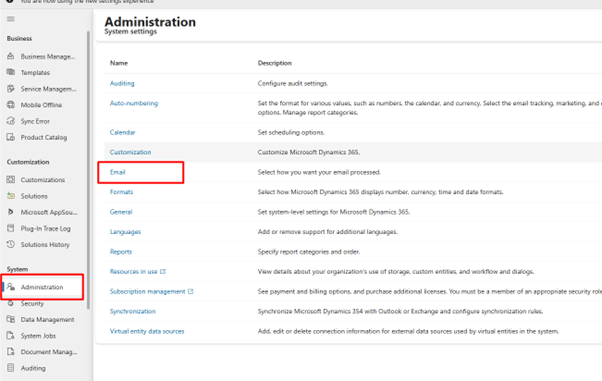
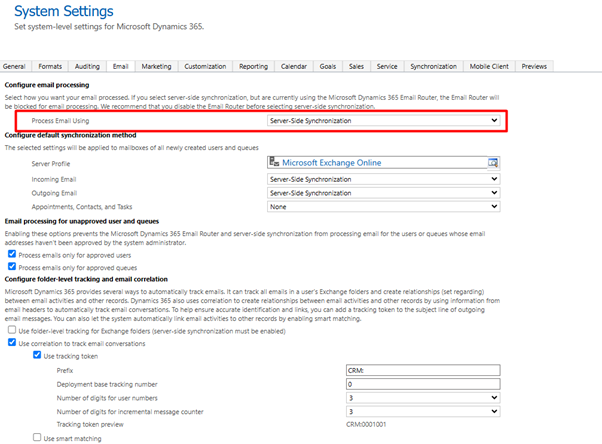
3. Set Process Email Using to Server-Side Synchronization
Step 2: Test email configuration and enable mailboxes
- From your app, go to Settings > Advanced Settings.
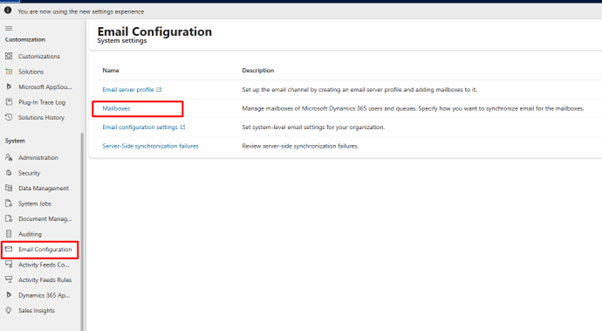
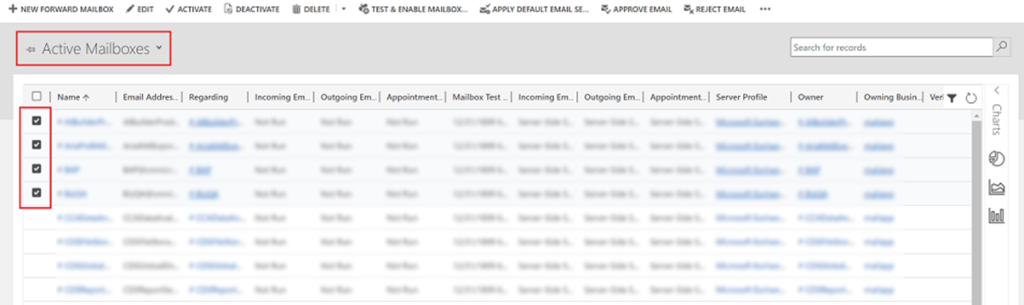
2. Go Email Configuration and then select Mailboxes.
3. Select the Active Mailboxes view, and then select the mailboxes that you want to test and enable
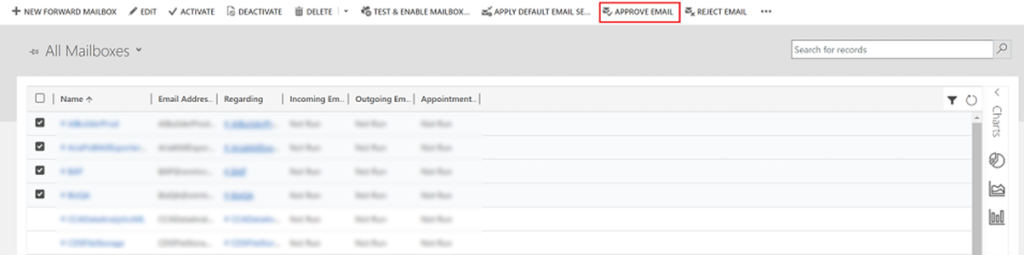
4. On the command bar, select APPROVE EMAIL and then select OK
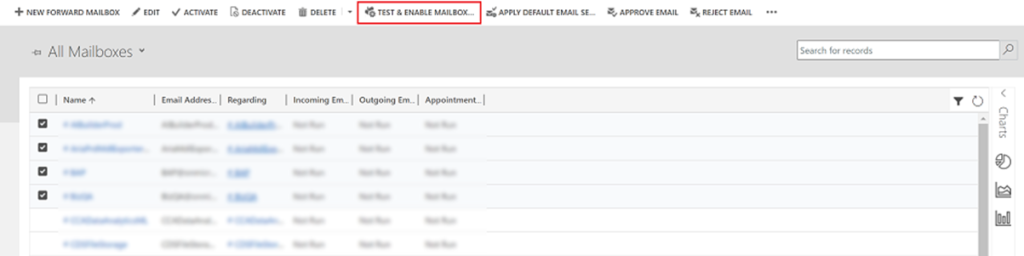
5. Once approved, select TEST & ENABLE MAILBOX.
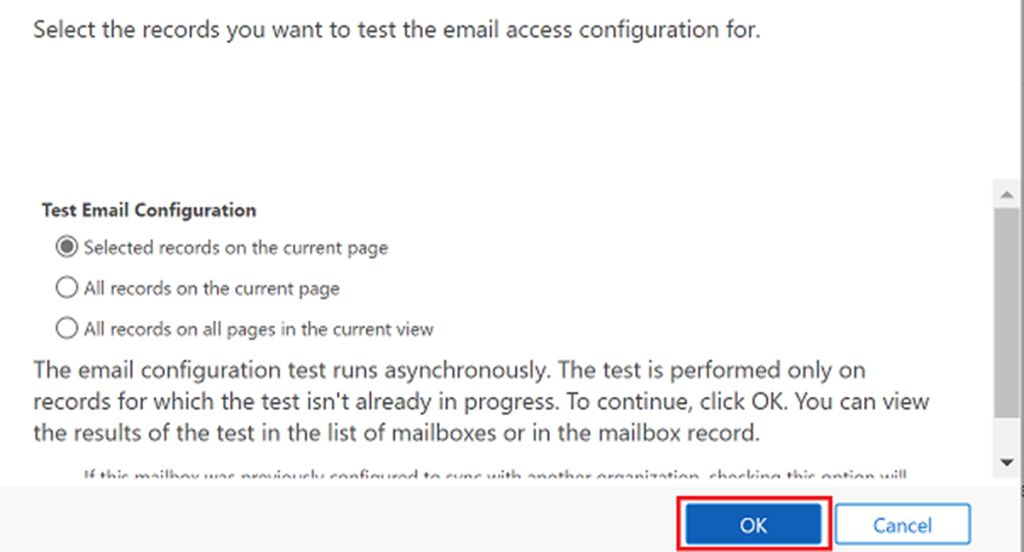
6. On the confirmation dialog box, select OK.
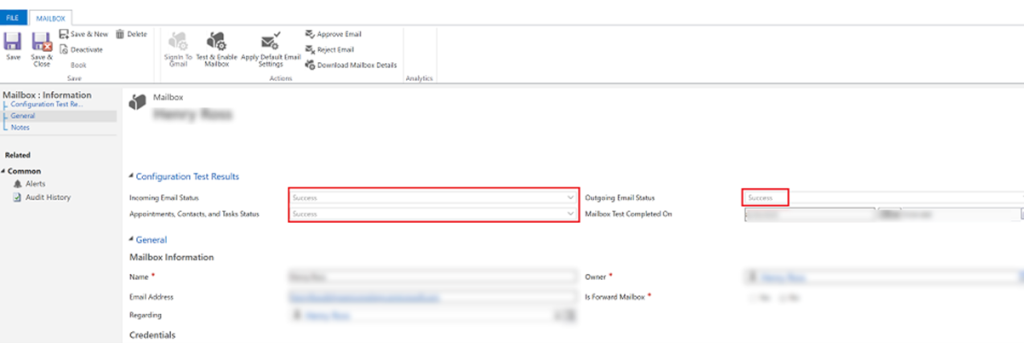
Step 2.1: Verify configuration
- Select the active mailbox and click on Edit
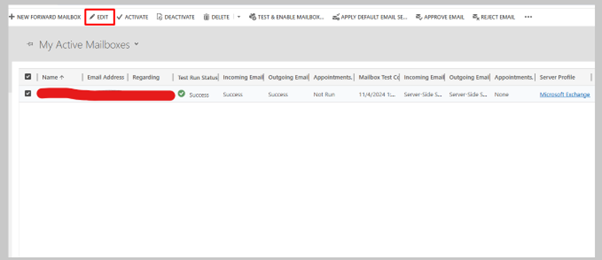
2. If the setup is successful, the configuration Test Results section will change from Not Run to Success
Step 3: Provide security role access
- From your app, go to Settings > Advanced Settings.

2. Go to Security and then select Users.

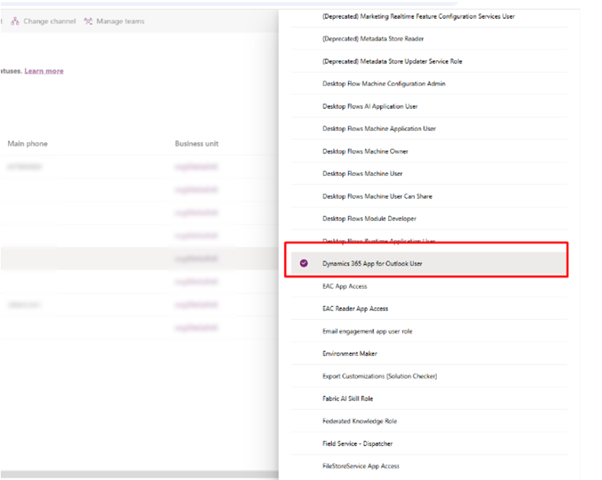
3. Select the users from the list and then select Manage Roles.
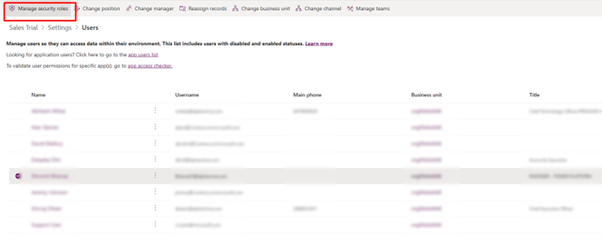
4. In the Manage User Roles dialog, select the Dynamics 365 App for Outlook User security role to the users and then select OK.
Step 4: Install App for Outlook
From your app, go to Settings > Advanced Settings.

2. Go to Dynamics 365 App for Outlook and Select the checkbox to automatically add App for Outlook to all eligible users.

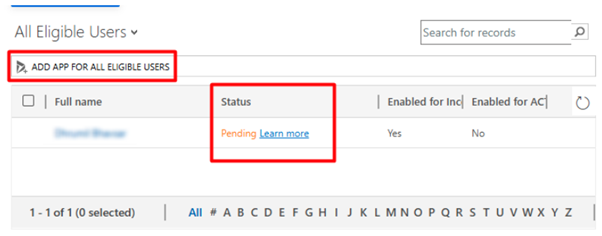
3. Select ADD APP FOR EIGIBILE USERS to deploy the app to all users that are set up correctly. The Status will change to Pending. To modernize IT systems further, check out Technology Transformation Services.
4. Push the app to certain users, select those users in the list, and then select Add App to Outlook

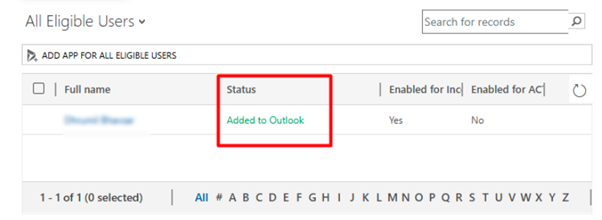
5. The status will change to Added to Outlook and the app will be available for your users.
6. The app will appear in the Outlook ribbon for the added users.
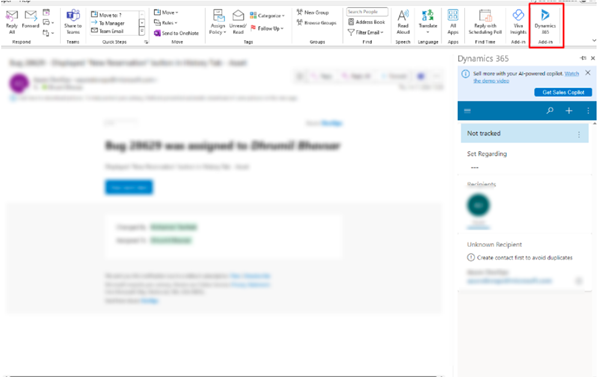
Step 5: Opening the Dynamics 365 App for Outlook
- Open the Emails You Want to Track in Microsoft Dynamics CRM and click on Dynamics 365
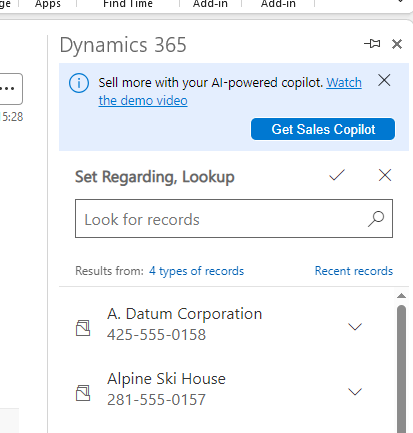
In the Set Regarding search box, type the name of the record you wish to track the email to. You can track to
> Contacts
> Leads
> Accounts
> Opportunities
> Orders
> Quotes
> and most other entities
When the email is successfully tracked you’ll see this

Adding a new record with the Dynamics 365 App for Outlook
You can create new contacts, leads or accounts from the Dynamics 365 App for Outlook.
> Open the email which contains the information you’d like to add to Dynamics
> Open the Dynamics 365 tab

> Choose the record type to create
If you’d like the Dynamics 365 tab to remain open for all emails, you can click the pin icon
Want to connect Outlook with Dynamics 365?
Sync emails, manage customer interactions, and track communication seamlessly inside Microsoft Dynamics 365.
FAQs
What Are the Prerequisites for Tracking Outlook Emails in Dynamics 365?
Several prerequisites are required to track Outlook emails in Dynamics 365. First, you need an active Dynamics 365 subscription. Additionally, your organisation must use Exchange Online or Exchange Server 2013 or later. These are required for Server-Side Synchronisation to work correctly.
Furthermore, an administrator must deploy the Dynamics 365 App for Outlook. This enables the tracking panel within your Outlook inbox. However, individual users also need the correct security roles assigned in Dynamics 365. Without these, the add-in will appear but tracking features will be restricted. As a result, configuration requires both IT admin setup and user-level permissions. Therefore, plan the deployment in two stages. First, the admin configures the environment. Then, users are provisioned and trained. Moreover, mailbox approval in Dynamics 365 settings must be completed before tracking becomes active for each user.
What Are the Key Benefits of CRM and Outlook Email Integration?
Integrating Dynamics 365 with Outlook delivers significant productivity benefits for sales and service teams. First, it eliminates the need to manually copy email data between systems. All tracked emails appear automatically on the linked CRM record. Additionally, team members gain full visibility into customer email history without leaving Dynamics 365.
Furthermore, this integration improves response times significantly. Sales reps can view previous conversations before making calls or sending proposals. As a result, customer interactions feel more informed and personalised. However, the benefits extend beyond communication tracking. Linked emails populate activity timelines and help managers monitor team engagement levels. Therefore, leaders gain accurate data for coaching and performance reviews. Moreover, automated tracking reduces the risk of missed follow-ups. Our AI in CRM operations guide explores how intelligent features can enhance these Dynamics 365 email tracking capabilities even further.
Do Users Need Special Security Roles to Use the Outlook Add-In?
Yes, users need specific security roles to use the Dynamics 365 App for Outlook. First, they require the standard Dynamics 365 user role for basic CRM access. Additionally, the system administrator must grant the Use Dynamics 365 App for Outlook privilege. Without this privilege, the add-in will not load correctly inside Outlook.
Furthermore, administrators can assign this privilege to existing security roles. Alternatively, they can create a custom role specifically for Outlook integration users. However, granting excessive permissions creates unnecessary security risks. Therefore, apply the principle of least privilege when assigning roles. Moreover, mailbox records must also be approved in the Dynamics 365 System Settings. As a result, two separate administrative tasks must be completed for each user. First, grant the security role. Then, approve the mailbox. This two-step process protects your CRM data while enabling the integration effectively for all team members.
How Do I Configure Server-Side Synchronisation for Email Tracking?
Server-Side Synchronisation is the core mechanism that connects Dynamics 365 with your email system. First, navigate to Settings and then Email Configuration in Dynamics 365. Additionally, select the Server Profiles option and create a new Exchange Online profile. As a result, Dynamics 365 can communicate directly with your Exchange server.
Furthermore, configure the incoming and outgoing email server settings within the profile. Specify the authentication type based on your Exchange environment. However, for Exchange Online with Microsoft 365, OAuth 2.0 is the recommended authentication method. Therefore, ensure your Microsoft 365 tenant permits this connection in its admin settings. Moreover, after creating the profile, apply it to individual mailboxes or all mailboxes in the Dynamics 365 admin settings. Finally, test the configuration using the Test and Enable option. This confirms the synchronisation works correctly before you roll it out to your full user base.
Can Email Tracking Be Automated for Large Teams?
Yes, email tracking can be partially automated in Dynamics 365. First, administrators can enable automatic tracking of all incoming emails for specified users. Additionally, Smart Matching rules allow Dynamics 365 to automatically link emails to existing records based on email addresses. As a result, manual tracking effort decreases significantly for busy teams.
Furthermore, Category-Based Tracking allows users to track emails by applying a specific Outlook category. This gives individuals control over which emails enter CRM without requiring manual action in the add-in. However, fully automating email tracking for large teams requires careful policy configuration. Therefore, work with your system administrator to define tracking rules that balance automation with data quality. Moreover, Power Automate extends these capabilities even further. Our Power Automate flow guide demonstrates how to build custom email routing and logging workflows for high-volume Dynamics 365 teams effectively.
Which Record Types Can I Link When I Track Outlook Emails in Dynamics 365?
Dynamics 365 supports linking tracked emails to several standard record types. First, you can link emails directly to Contacts, Accounts, and Leads. Additionally, emails can be associated with Opportunities, Cases, and Activities. As a result, the email appears in the activity timeline of each linked record automatically.
Furthermore, linking to multiple records simultaneously is supported. For example, a single email can be linked to both a Contact and an Opportunity at the same time. However, the system will not automatically link to all possible matches. Therefore, users should review suggested matches within the Outlook add-in before confirming. Moreover, custom entities can also support email tracking if your administrator configures them correctly. This extends visibility to bespoke CRM modules specific to your organisation. As a result, no customer communication is missed, regardless of which Dynamics 365 module manages that relationship in your system.